discovery-listicles
10 Make-Ahead Lunch Recipes for a Healthy Week
Planning ahead is a key strategy for maintaining a healthy diet, especially when it comes to lunchtime. To simplify your week and ensure you have nourishing meals on hand, we’ve curated ten make-ahead lunch recipes perfect for a healthy week. Each recipe is designed to be prepared in advance, featuring wholesome ingredients that are both satisfying and delicious. From vibrant salads to hearty grain bowls, these make-ahead lunches are easy to prepare and pack, helping you stay on track with your health goals while saving time during busy days. Embrace the convenience of meal prep and enjoy flavorful, nutritious lunches that fuel your body and mind.
Spicy Weight-Loss Cabbage Soup
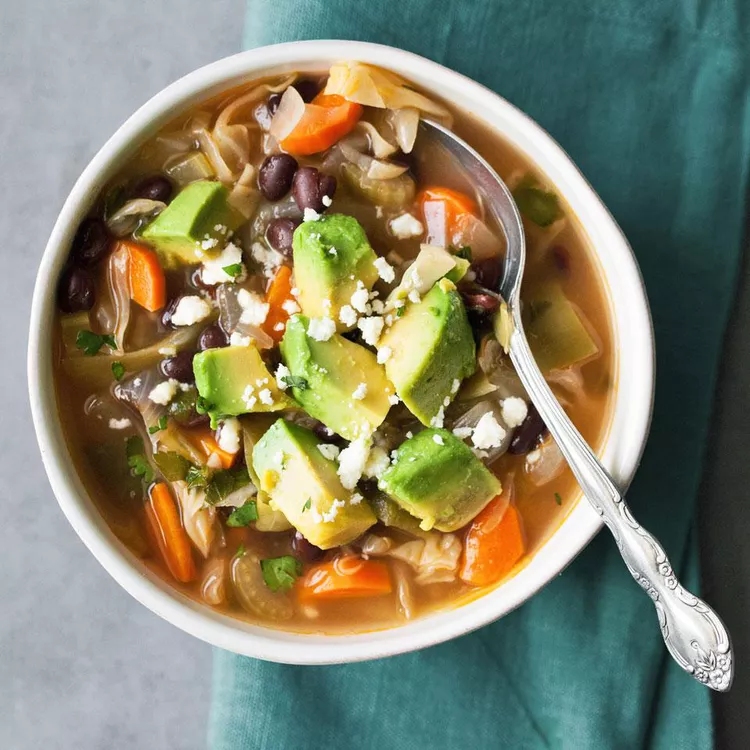
Elevate your meal prep with this flavorful Spicy Weight-Loss Cabbage Soup! This hearty soup is loaded with nutrient-dense vegetables and a zesty kick, making it a perfect choice for those looking to shed a few pounds. Packed with fiber and low in calories, it’s both satisfying and nourishing. Ideal for make-ahead lunches, this soup can be easily stored and reheated, ensuring you have a delicious and healthy option ready to go throughout the week. Enjoy a bowl of warmth and wellness that supports your healthy eating journey!
Ingredients
1 small head of cabbage, chopped
1 onion, diced
2 cloves garlic, minced
2 carrots, sliced
2 celery stalks, chopped
1 can (14 oz) diced tomatoes (with juice)
4 cups vegetable or chicken broth
1-2 tsp red pepper flakes (to taste)
1 tsp paprika
Salt and pepper to taste
Optional: chopped herbs for garnish (parsley or cilantro)
Instructions
1. Sauté Vegetables: In a large pot, sauté onion and garlic until translucent. Add carrots and celery; cook for 5 minutes.
2. Add Cabbage and Spices: Stir in chopped cabbage, diced tomatoes, red pepper flakes, paprika, salt, and pepper. Cook for another 5 minutes.
3. Add Broth: Pour in the broth and bring to a boil. Reduce heat and simmer for 25-30 minutes, until the vegetables are tender.
4. Serve: Adjust seasoning if necessary. Garnish with fresh herbs before serving.
Crustless Spinach Quiche
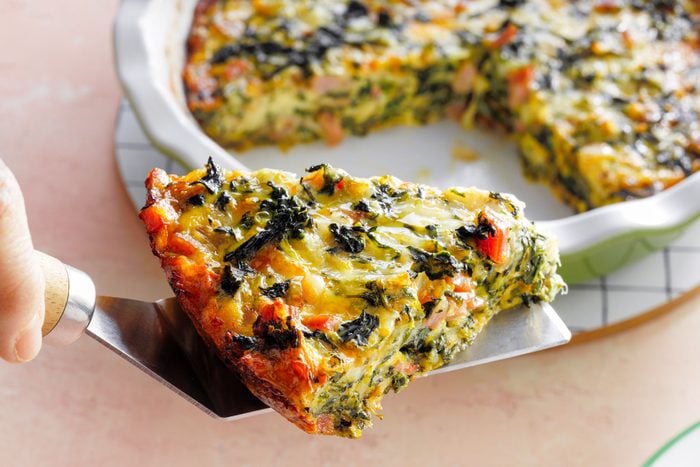
Enjoy a light and nutritious lunch with this Crustless Spinach Quiche! Packed with protein, leafy spinach, and flavorful herbs, this quiche is a perfect make-ahead option for a healthy week. With no crust, it’s lower in carbs but still rich in taste and texture. Easy to prepare and ideal for meal prep, it’s a versatile dish that can be enjoyed warm or cold, keeping you satisfied and on track with your healthy eating goals throughout the week!
Ingredients
1 tbsp olive oil
1 small onion, diced
3 cups fresh spinach, chopped
4 large eggs
1 cup milk (dairy or plant-based)
1/2 cup shredded cheese (cheddar, mozzarella, or your choice)
Salt and pepper to taste
Optional: 1/4 tsp nutmeg
Instructions
1. Preheat Oven: Preheat your oven to 375°F (190°C). Lightly grease a 9-inch pie dish.
2. Sauté Vegetables: Heat olive oil in a skillet over medium heat. Add onion and sauté until soft, about 3 minutes. Add spinach and cook until wilted, about 2-3 minutes. Remove from heat and let cool slightly.
3. Mix Eggs and Milk: In a large bowl, whisk together eggs, milk, salt, pepper, and nutmeg (if using).
4. Assemble: Spread the spinach and onion mixture evenly in the pie dish. Pour the egg mixture over it, then sprinkle with shredded cheese.
5. Bake: Bake for 30-35 minutes, or until the quiche is set and slightly golden on top.
6. Serve: Let cool for a few minutes before slicing.
Grilled Steak Fajitas
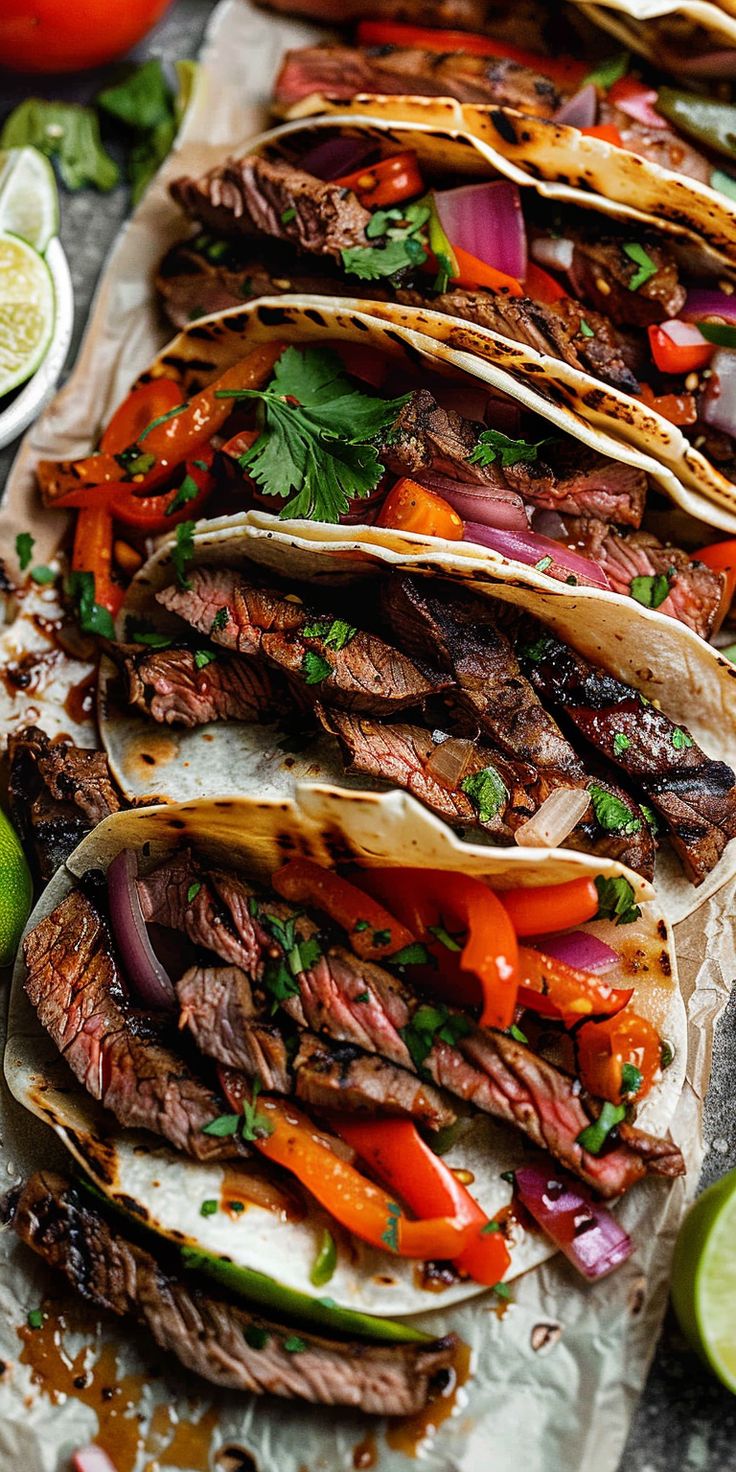
Spice up your lunch routine with these flavorful Grilled Steak Fajitas! Tender, marinated steak is grilled to perfection and paired with sautéed peppers and onions for a protein-packed meal that’s both satisfying and nutritious. Perfect for meal prep, these fajitas are easy to assemble ahead of time and make a delicious, healthy lunch option for the week. With bold flavors and wholesome ingredients, they’re an ideal way to fuel your day while staying on track with your healthy eating goals!
Ingredients
1 lb flank or skirt steak
1 red bell pepper, sliced
1 yellow bell pepper, sliced
1 onion, sliced
2 tbsp olive oil
2 tsp chili powder
1 tsp cumin
1 tsp garlic powder
Salt and pepper to taste
8 small flour or corn tortillas
Optional toppings: sour cream, salsa, guacamole, cilantro, lime wedges
Instructions
1. Marinate Steak: Rub steak with 1 tbsp olive oil, chili powder, cumin, garlic powder, salt, and pepper. Let it marinate for at least 30 minutes.
2. Grill Steak: Preheat grill to medium-high heat. Grill steak for 4-5 minutes per side for medium-rare or to your desired doneness. Remove from grill and let rest for 5 minutes before slicing.
3. Sauté Veggies: In a skillet, heat 1 tbsp olive oil over medium heat. Add bell peppers and onions, and sauté until soft, about 5-7 minutes.
4. Warm Tortillas: While the veggies cook, warm tortillas on the grill or in a pan.
5. Assemble Fajitas: Slice the steak thinly and serve with sautéed veggies in tortillas. Add toppings as desired.
Shredded Chicken Gyros
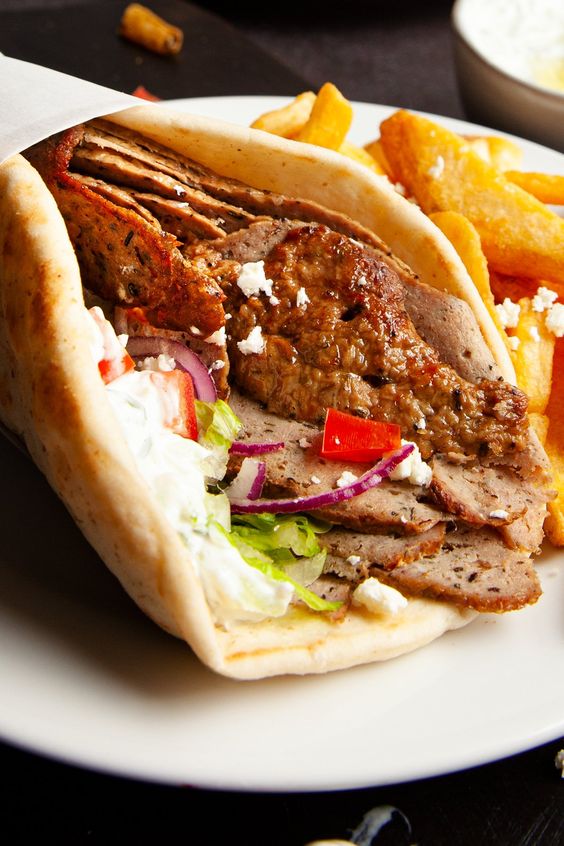
Elevate your lunch routine with these flavorful Shredded Chicken Gyros! Packed with tender chicken, fresh veggies, and a zesty yogurt sauce, these gyros are perfect for meal prep. Easy to assemble and full of protein, they’re a satisfying and healthy option that will keep you energized throughout the week. Prepare the ingredients ahead of time and enjoy a quick, delicious, and balanced lunch that fits seamlessly into your healthy eating plan!
Ingredients
2 cups cooked, shredded chicken
4 pita breads or flatbreads
1/2 cup tzatziki sauce
1/2 cup cucumber, sliced
1/2 cup tomatoes, chopped
1/4 red onion, thinly sliced
1 tbsp olive oil
1 tsp dried oregano
Salt and pepper to taste
Optional: crumbled feta cheese and fresh herbs for garnish
Instructions
1. Season Chicken: In a skillet, heat olive oil over medium heat. Add shredded chicken, oregano, salt, and pepper. Cook until heated through, about 3-4 minutes.
2. Warm Pitas: Warm the pita breads in a pan or the oven until soft and pliable.
3. Assemble Gyros: Spread a generous amount of tzatziki sauce on each pita. Add the seasoned chicken, cucumber, tomatoes, and red onion.
4. Garnish: Add feta cheese and fresh herbs if desired. Fold the pita and serve.
Pepperoni Bread
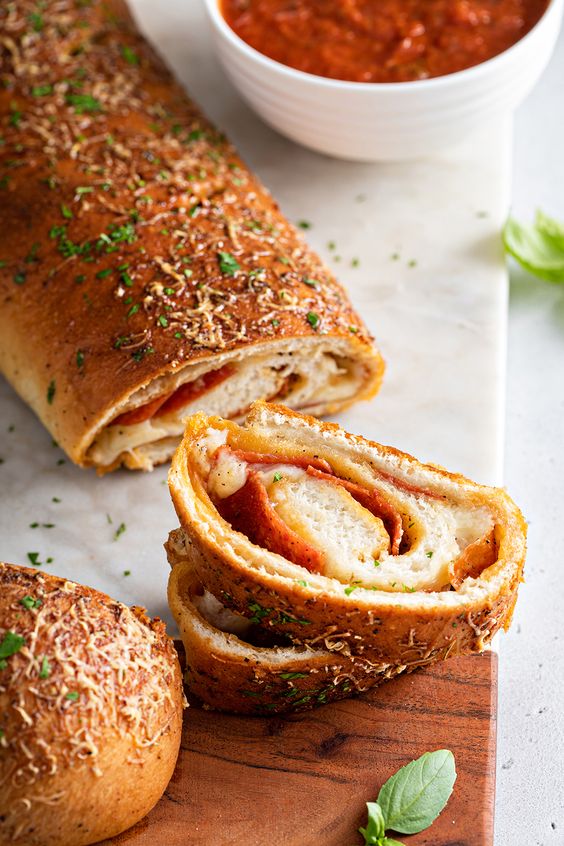
Add some excitement to your lunches with this flavorful Pepperoni Bread! Filled with savory pepperoni and melty cheese, this make-ahead recipe is a convenient option for a quick, delicious lunch throughout the week. It’s easy to prepare and can be enjoyed warm or cold, making it a versatile addition to your meal prep routine. While indulgent, this bread can be balanced with a fresh side salad for a healthy and satisfying midday meal that keeps you energized and ready for the rest of your day!
Ingredients
1 pound frozen bread dough, thawed
4 ounces sliced pepperoni
1 cup shredded mozzarella cheese
¼ cup grated Parmesan cheese
1½ teaspoons Italian seasoning
1 large egg, beaten (for egg wash)
Instructions
1. Prepare the Dough: Place the thawed bread dough in a bowl, cover it, and let it rise in a warm place until doubled in volume, about 1 hour (
2. Preheat the Oven: Preheat your oven to 375°F (190°C). Line a baking sheet with parchment paper.
3. Roll Out the Dough: On a lightly floured surface, roll the dough into a rectangle approximately 10×12 inches in size.
4. Layer the Fillings: Brush the rolled-out dough with the beaten egg. Arrange the pepperoni slices evenly over the dough, followed by the shredded mozzarella and grated Parmesan. Sprinkle the Italian seasoning over the top.
5. Roll and Seal: Starting from the long side, roll the dough tightly into a cylinder, sealing the edges as you go. Place the roll seam-side down on the prepared baking sheet.
6. Bake: Bake in the preheated oven for about 40 minutes, or until the bread is golden brown.
7. Serve: Allow the pepperoni bread to cool slightly before slicing. Serve warm with marinara sauce for dipping, if desired.
Cashew-Chicken Rotini Salad
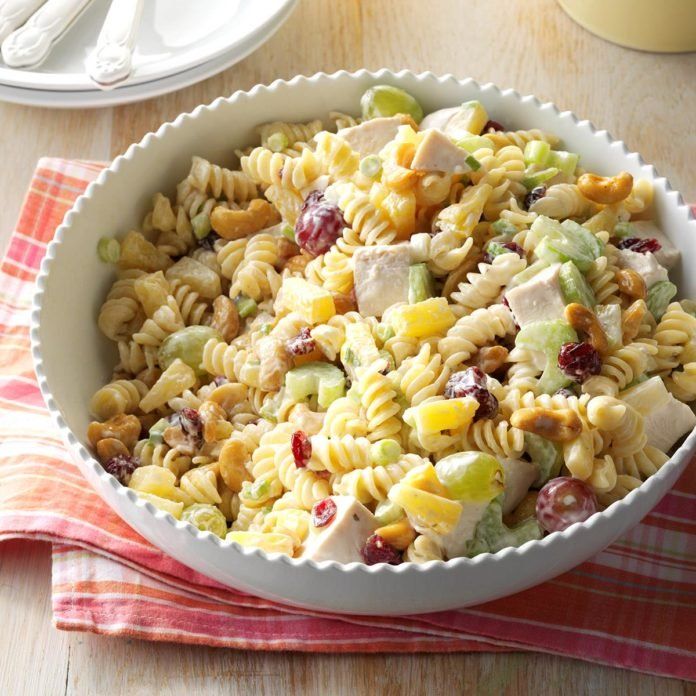
Boost your meal prep game with this flavorful Cashew-Chicken Rotini Salad! Featuring tender chicken, crunchy cashews, and al dente rotini pasta, this salad is a perfect balance of protein, healthy fats, and vibrant veggies. Easy to prepare and store, it’s ideal for make-ahead lunches that keep you full and energized throughout the week. With its delicious blend of textures and flavors, this nutritious salad is a satisfying option for staying on track with your healthy eating goals!
Ingredients
2 cups cooked rotini pasta
1 1/2 cups cooked chicken breast, shredded or cubed
1/2 cup cashews
1/2 cup celery, sliced
1/2 cup red bell pepper, diced
1/4 cup green onions, sliced
1/4 cup mayonnaise or Greek yogurt
2 tbsp soy sauce
1 tbsp rice vinegar
1 tsp sesame oil
Salt and pepper to taste
Instructions
1. Prepare Dressing: In a small bowl, whisk together mayonnaise (or Greek yogurt), soy sauce, rice vinegar, sesame oil, salt, and pepper.
2. Assemble Salad: In a large bowl, combine cooked rotini, chicken, cashews, celery, red bell pepper, and green onions.
3. Toss with Dressing: Pour the dressing over the salad and toss until everything is well-coated.
4. Chill and Serve: Refrigerate for at least 30 minutes to let the flavors meld. Serve chilled.
Honey-Lime Roasted Chicken
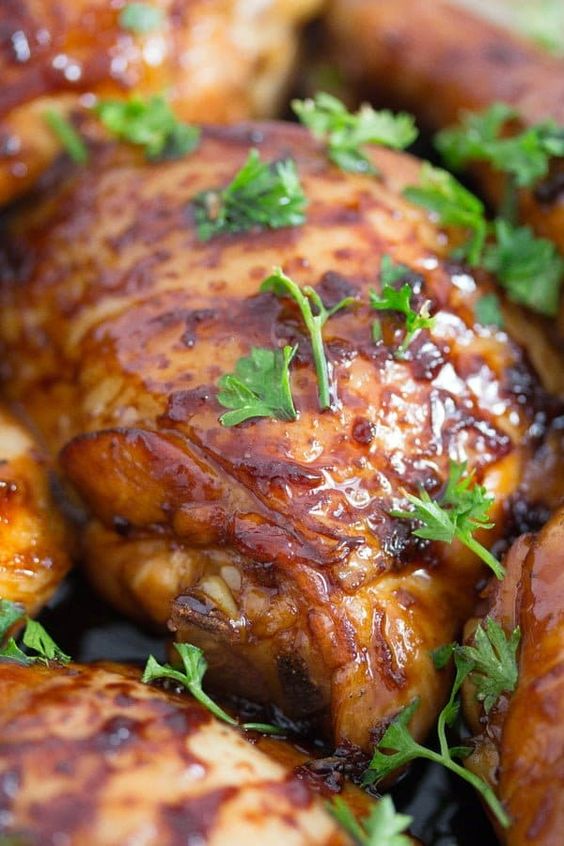
Elevate your meal prep with this flavorful Honey-Lime Roasted Chicken! This dish features tender chicken marinated in a delicious honey-lime glaze, resulting in a perfect balance of sweet and tangy flavors. Ideal for make-ahead lunches, it pairs beautifully with a variety of sides, such as grains or salads, making it versatile and satisfying. Rich in protein and easy to prepare in bulk, this roasted chicken will keep you nourished and energized throughout the week. Enjoy a delicious and healthy lunch that simplifies your busy days!
Ingredients
1 whole chicken (about 3-4 pounds)
1/4 cup honey
1/4 cup lime juice (freshly squeezed)
3 tablespoons olive oil
4 cloves garlic, minced
1 teaspoon salt
1 teaspoon black pepper
1 teaspoon paprika (optional)
Fresh cilantro or parsley for garnish (optional)
Instructions
1. Preheat the Oven: Preheat your oven to 425°F (220°C).
2. Prepare the Marinade: In a bowl, whisk together honey, lime juice, olive oil, minced garlic, salt, pepper, and paprika until well combined.
3. Marinate the Chicken: Place the chicken in a large resealable plastic bag or a dish. Pour the marinade over the chicken, ensuring it’s well coated. Seal the bag or cover the dish, and marinate in the refrigerator for at least 1 hour (or up to overnight for better flavor).
4. Roast the Chicken: Remove the chicken from the marinade and place it in a roasting pan or baking dish. Pour any remaining marinade over the chicken.
5. Bake: Roast in the preheated oven for about 1 hour, or until the internal temperature reaches 165°F (74°C) and the skin is golden brown. Baste the chicken with the pan juices halfway through for extra flavor and moisture.
6. Rest and Serve: Remove the chicken from the oven and let it rest for about 10 minutes before carving. Garnish with fresh cilantro or parsley, if desired. Serve with your favorite sides.
Quinoa Turkey Chili
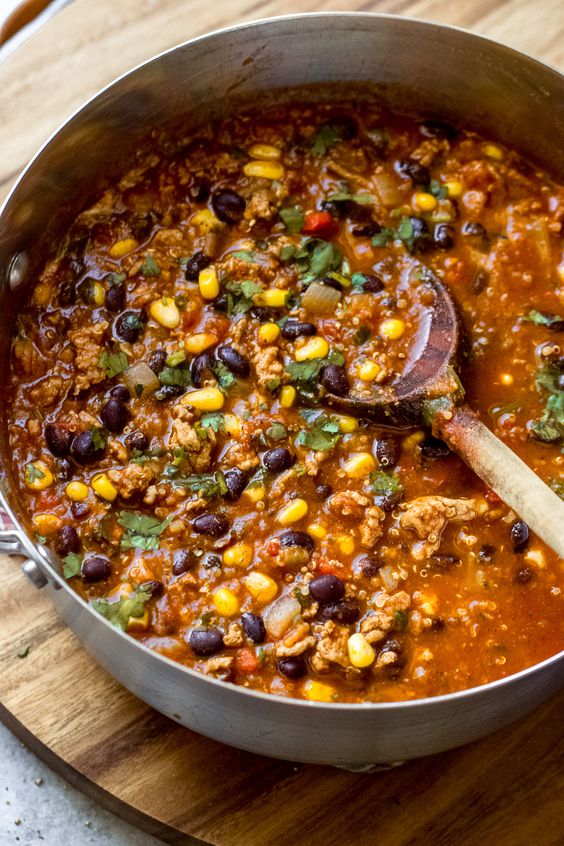
Get ready for a hearty and nutritious meal with Quinoa Turkey Chili! This delicious chili combines lean turkey, protein-packed quinoa, and a medley of vegetables, creating a satisfying dish that’s perfect for meal prep. Easy to make in batches, it stores well in the fridge or freezer, making it an ideal choice for make-ahead lunches throughout the week. Packed with fiber and essential nutrients, this chili will keep you feeling full and energized, making it a deliciously healthy option for your busy days!
Ingredients
1 pound ground turkey
1 cup quinoa, rinsed
1 can (14.5 oz) diced tomatoes (with juices)
1 can (15 oz) black beans, drained and rinsed
1 can (15 oz) kidney beans, drained and rinsed
1 cup vegetable or chicken broth
1 medium onion, chopped
2 cloves garlic, minced
1 bell pepper, chopped (any color)
1 tablespoon chili powder
1 teaspoon cumin
1 teaspoon smoked paprika
1/2 teaspoon salt
1/4 teaspoon black pepper
1 tablespoon olive oil
Optional toppings: avocado, cilantro, shredded cheese, sour cream
Instructions
1. Sauté the Vegetables: In a large pot or Dutch oven, heat the olive oil over medium heat. Add the chopped onion, garlic, and bell pepper. Sauté for about 5 minutes, until the vegetables are softened.
2. Cook the Turkey: Add the ground turkey to the pot. Cook, breaking it apart with a spoon, until browned and cooked through (about 5-7 minutes).
3. Add Spices: Stir in the chili powder, cumin, smoked paprika, salt, and black pepper. Cook for an additional minute until fragrant.
4. Combine Ingredients: Add the rinsed quinoa, diced tomatoes (with juices), black beans, kidney beans, and broth. Stir to combine.
5. Simmer: Bring the mixture to a boil, then reduce the heat to low. Cover and simmer for about 20-25 minutes, or until the quinoa is cooked and the chili has thickened. Stir occasionally to prevent sticking.
6. Adjust Seasoning: Taste and adjust seasoning if necessary. If you prefer a spicier chili, add some cayenne pepper or hot sauce.
7. Serve: Ladle the chili into bowls and top with your choice of avocado, cilantro, shredded cheese, or sour cream.
Sesame Beef & Asparagus Salad
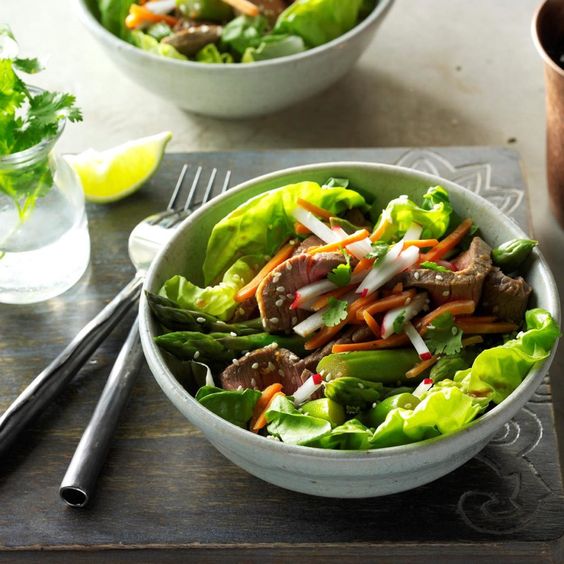
Elevate your lunch game with this flavorful Sesame Beef & Asparagus Salad! This vibrant salad features tender strips of beef, crisp asparagus, and a zesty sesame dressing that brings everything together. Packed with protein and essential nutrients, it’s a satisfying meal that supports your healthy eating goals. Perfect for meal prep, this salad can be made ahead of time and stored in the fridge, making it a convenient option for busy weeks. Enjoy a delicious and nutritious lunch that keeps you energized and ready to take on the day!
Ingredients
1 pound beef sirloin or flank steak, thinly sliced
1 bunch asparagus, trimmed and cut into 2-inch pieces
4 cups mixed salad greens (like spinach, arugula, or spring mix)
1/4 cup sesame oil
2 tablespoons soy sauce (low-sodium, if preferred)
2 tablespoons rice vinegar
1 tablespoon honey or maple syrup
1 tablespoon fresh ginger, grated
2 cloves garlic, minced
1 tablespoon sesame seeds (toasted, for garnish)
Salt and pepper, to taste
Optional: green onions, chopped (for garnish)
Instructions
1. Prepare the Dressing: In a small bowl, whisk together sesame oil, soy sauce, rice vinegar, honey, grated ginger, minced garlic, and a pinch of salt and pepper. Set aside.
2. Cook the Beef: In a skillet over medium-high heat, add a bit of oil if needed. Add the sliced beef and season with salt and pepper. Cook for about 3-5 minutes, stirring occasionally, until browned and cooked to your desired doneness. Remove from heat and let it rest.
3. Blanch the Asparagus: In a pot of boiling water, add the asparagus pieces and blanch for about 2-3 minutes until bright green and tender-crisp. Drain and immediately transfer to a bowl of ice water to stop the cooking process. Drain again after a few minutes.
4. Assemble the Salad: In a large bowl, combine the mixed salad greens, blanched asparagus, and cooked beef.
5. Dress the Salad: Drizzle the prepared dressing over the salad and toss gently to combine.
6. Serve: Transfer the salad to serving plates or bowls. Garnish with toasted sesame seeds and chopped green onions, if desired.
Pressure-Cooker Char Siu Pork
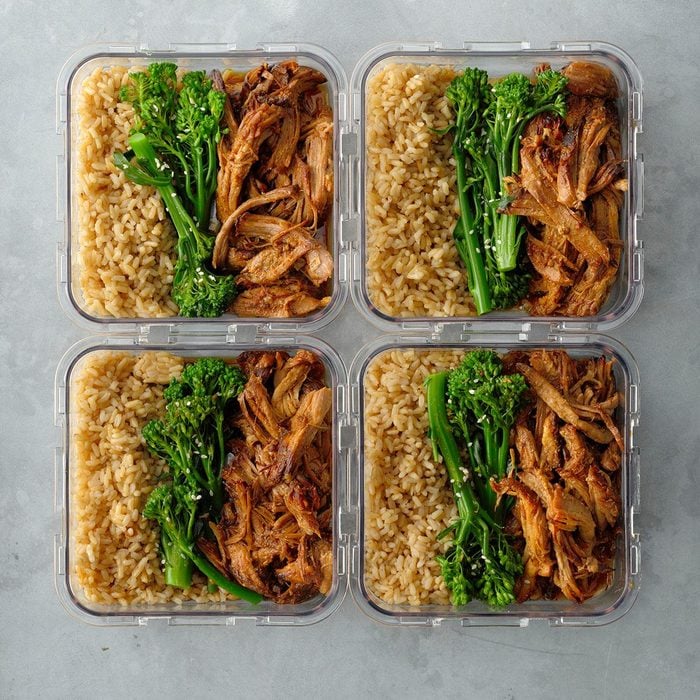
Elevate your lunch options with Pressure-Cooker Char Siu Pork, a flavorful and succulent dish that’s perfect for meal prep! This Asian-inspired pork is marinated in a savory-sweet sauce and cooked to perfection in a pressure cooker, resulting in tender, juicy slices that are rich in flavor. Ideal for making ahead of time, this versatile protein can be added to salads, rice bowls, or sandwiches throughout the week. Quick to prepare and packed with protein, this Char Siu Pork will keep your lunches exciting and satisfying while supporting your healthy eating goals!
Ingredients
2 pounds pork shoulder (or pork belly), cut into long strips
1/4 cup hoisin sauce
1/4 cup soy sauce (low-sodium if preferred)
1/4 cup honey or brown sugar
2 tablespoons Chinese rice wine (or dry sherry)
1 tablespoon sesame oil
1 teaspoon five-spice powder
2 cloves garlic, minced
1 tablespoon grated fresh ginger
1/4 teaspoon red food coloring (optional, for color)
1/4 cup water
Sliced green onions and sesame seeds (for garnish, optional)
Instructions
1. Prepare the Marinade: In a bowl, mix hoisin sauce, soy sauce, honey (or brown sugar), rice wine, sesame oil, five-spice powder, minced garlic, grated ginger, and red food coloring (if using) until well combined.
2. Marinate the Pork: Place the pork strips in a resealable plastic bag or a dish. Pour the marinade over the pork, ensuring it’s well coated. Seal the bag or cover the dish and refrigerate for at least 1 hour (or overnight for deeper flavor).
3. Sear the Pork: Remove the pork from the marinade and set the marinade aside. In the pressure cooker, select the sauté function and add a bit of oil if needed. Sear the pork strips on all sides until browned, about 3-4 minutes per side. You may need to do this in batches.
4. Pressure Cook: Once the pork is browned, add the reserved marinade and water to the pot. Seal the lid and set the pressure cooker to high pressure for 40 minutes.
5. Natural Release: After the cooking time is complete, allow the pressure to release naturally for about 10 minutes, then perform a quick release to release any remaining pressure.
6. Glaze the Pork: Remove the pork from the cooker and set it on a baking sheet lined with aluminum foil. Brush some of the sauce from the pot over the pork. You can optionally broil the pork in the oven for 3-5 minutes to caramelize the glaze.
7. Slice and Serve: Let the pork rest for a few minutes before slicing. Serve it with rice or in buns, garnished with sliced green onions and sesame seeds if desired.

